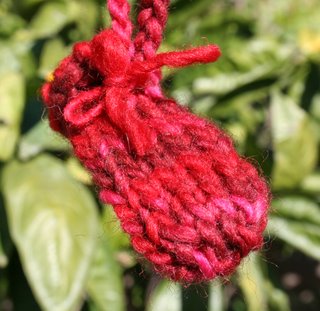
Here's another tiny mitten. I like this one much better; it has more of a mitteny shape than the larger one. Here's how it's done:
A few yards of worsted weight yarn, or really, whatever you've got on hand.
DP needles to give you a pleasing guage.
I used Manos del Uruguay Bing Cherry and size 7 needles.
CO 3 sts loosely
Knit one row
Flip the stitches over so you can see the purl bumps on the bottom. On a second needle, pick up and knit 3 sts through those bumps. (This is one way to start socks from the toe up, too.)
You should now have three stitches on each of two needles, and they're ready to work in the round.
On each needle, k1, m1, k1, m1, k1
You should now have five stitches on each needle.
Knit until the "hand" of your mitten is as long as you want it. Mine is about 2". On the last round, knit until the last stitch, and then stop. You're going to decrease on either side to pinch in the wrist.
Take the last stitch on needle 2 and the first stitch on needle 1, and K2tog.
Then k3, k2tog, k3. You should have 8 sts in all.
Knit k2p2 ribbing for about an inch, BO all stitches, weave in ends.
Now you want a thumb. Go about 2/3 of the way down from the start of the mitten and about one stitch away from the right edge (or left edge, if you want a righthanded mitten!). Stick the point of one of your needles through the lefthand legs of two sts, and join yarn for I-cord. About 3 rounds of I-cord will give you the right length; break yarn and thread through the two loops on your needle; pull in while shaping the thumb to your liking, and then weave in the end.

To make a tie to hang the mitten, I just made a little rope of single crochet, and threaded the starting and BO ends through a couple of stitches on the back and tied a little bow.
2 comments:
it's so cute! :)
aw thanks! I made a better one while getting my hair cut but i left it with the girl so no picture. Lydia
Post a Comment