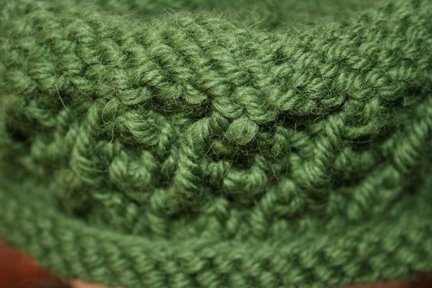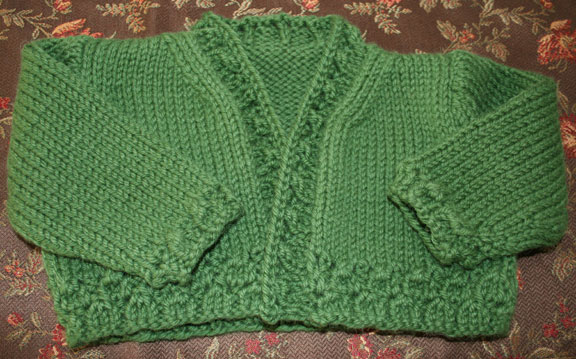
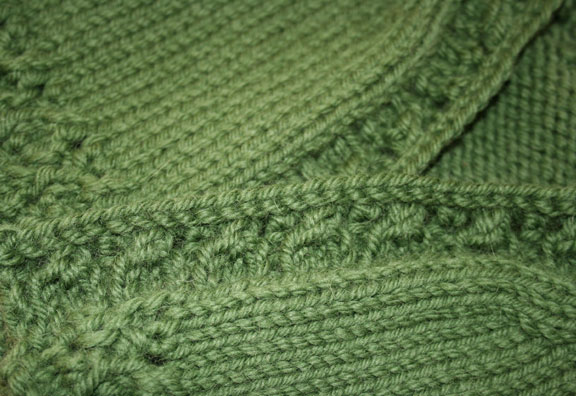
Before the hat, there was the sweater. This little cardigan, in a lovely green (pictures don't do it justice) knitted up very quickly and easily. I saw the Twisted Openwork Rib pattern in Knitting Over the Edge and I wondered how it would look on a thicker yarn; the open part isn't too open, but it still creates an interesting texture that I really like.
I am still looking for the perfect green ribbon to make a tied closure, but I thought I'd pop the pattern up here anyway. If you make it, please let me know how it turned out - mail me a picture, let me know if the pattern was clear...
Here it is:
Green Sweater
12 month size
Materials:
Two skeins of Knitpicks Sierra in Leaf, or another bulky yarn.
Size 7 straight needles, or size needed to obtain gauge.
Gauge: 15 stitches & 21 rows across 4" in stockinette
Pattern - Twisted Openwork Rib (worked in multiple of 4 plus 1)
Row 1: P1, *K3, P1, rep from * to end
Row 2: *K1, P3, rep from *, end K1
Row 3: Like row 1
Row 4: K1, *YO, P3tog, yo, K1, rep from * to end
Row 5: K2, P1, *K3, P1, rep from *, end K2
Row 6: P2, K1, *P3, K1, rep from *, end P2
Row 7: Like row 5
Row 8: P2tog, YO, K1, *YO, P3tog, YO, K1, rep from * to last 2 sts, YO, P2tog
This is what it looks like:

Back
CO 53
Work Rows 1 - 8 of the Twisted Openwork Rib pattern
Row 9: Knit to end, and continue in stockinette until piece measures 5" from cast-on edge, ending with a purl row
Shape armholes:
BO 2 sts at the beginning of the next 2 rows
Next row: K3, K2tog, knit to last 5 sts, SSK, K3
Decrease 1 st at each end of the next three RS (knit) rows in the same way; 41 sts remaining
Continue in stockinette with no shaping until piece measures 8 3/4" from cast-on edge, ending with a purl row
BO 9 sts at the beginning of the next 2 rows; place the remaining 23 sts on a holder and break yarn
Left Front
CO 25
Work Rows 1 - 8 of the Twisted Openwork Rib pattern
Row 9: Knit to end, and continue in stockinette until piece measures 5" from cast-on edge, ending with a purl row**
Shape armhole:
BO 2 sts at the beginning of the next row, K to end
Next row: P to last 5 sts, P2tog, P3 sts
Decrease 1 stitch at the end of the next three WS (purl) rows in the same way; 19 sts remaining
Shape neck (RS facing):
Row 1: K to last 5 sts, K2tog, K3
Row 2: P3, P2tog, P to end
Row 3: K to last 5 sts, K2tog, K3
Row 4: Purl to end
Repeat rows 3 & 4 until 11 sts remain
Continue in stockinette until piece measures about 8 3/4" from cast-on edge, ending with a purl row
Bind off all stitches and break yarn
Right Front
CO 25 and work as Left Front until you reach **, ending with a knit row
Shape armhole (WS facing):
BO 2 sts at the beginning of the next row, P to end
Next row: K to last 5 sts, K2tog, K3
Decrease 1 stitch at the end of the next three RS (knit) rows in the same way; 19 sts remaining
Shape neck (WS facing):
Row 1: P to last 5 sts, P2tog through back, P3
Row 2: K3, K2tog, K to end
Row 3: P to last 5 sts, P2tog through back, P3
Row 4: Knit to end
Continue in stockinette until piece measures about 8 3/4" from cast-on edge, ending with a purl row
Bind off all stitches and break yarn
Sleeves (Make two)

CO 25 and work Rows 1 - 4 of the Twisted Openwork Rib
Body of sleeve:
Row 1: Knit
Row 2: Purl
Row 3: K1, inc in 2nd st, knit to last 2 stitches, inc, K1
Row 4: Purl
Row 5: K1, inc in 2nd st, knit to last 2 sts, inc, K1
Rows 6, 8 & 10: Purl
Rows 7 & 9: Knit
Row 11: as row 5
Repeat rows 6 - 11 until you have 33 sts
Continue in stockinette (no shaping) until piece measures about 7" from cast-on edge, ending with a purl row
Shape cap:
BO 2 sts at the beginning of the next 2 rows
Row 1: K3, SSK, K to last 5 sts, K2tog, K3
Row 2: Purl
Repeat rows 1 & 2 until 21 sts remain
BO 3 at the beginning of the next 4 rows - 9 sts remain
Bind off all sts and break yarn
Assemble Sweater
Lightly block all pieces and mattress stitch together
Button Band
Starting at lower left hem, pick up 36 sts up the left front, break yarn, pick up the 23 sts from the holder, join yarn, pick up 36 sts down the right front. You have 95 sts.
With RS facing, work rows 1-4 of Twisted Openwork Rib
Bind off all stitches
Weave in ends and voila - you are done. Now pick your closure - you can choose to use buttons, in which case you can apply them to either side of the button band, using the eyelets in the Twisted Openwork Rib as buttonholes. Or, you can use a ribbon closure just at the beginning of where the v-neck starts, in which case it will be a little roomier, like a bolero for a slightly older child. If you plan for both it will give room to grow.
Copyright 2006 Windansea
For personal use only