Thursday, November 30, 2006

Little Mitten, Take Two


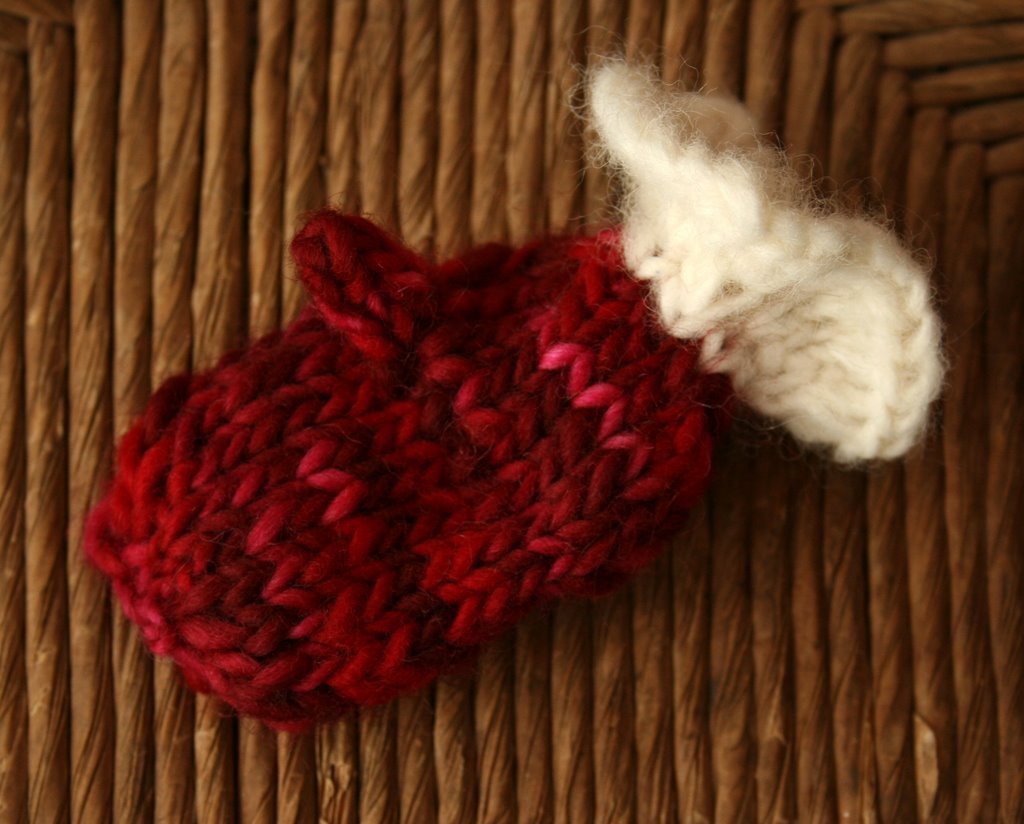
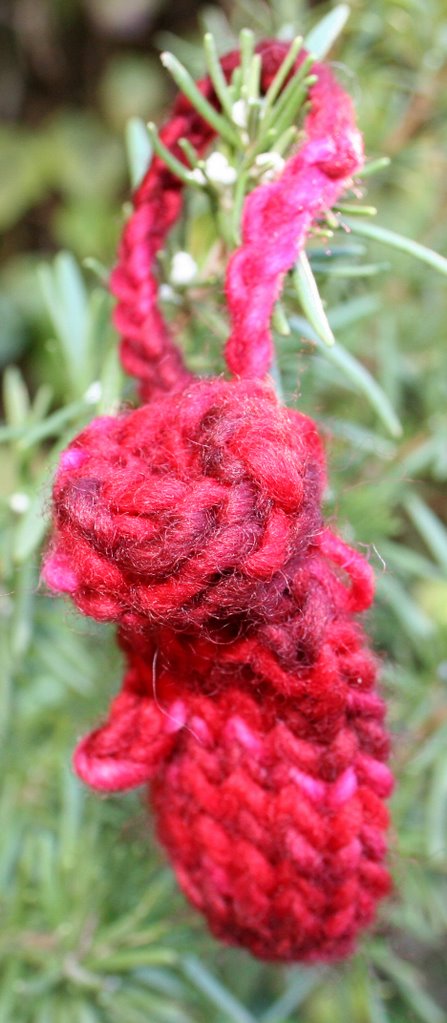
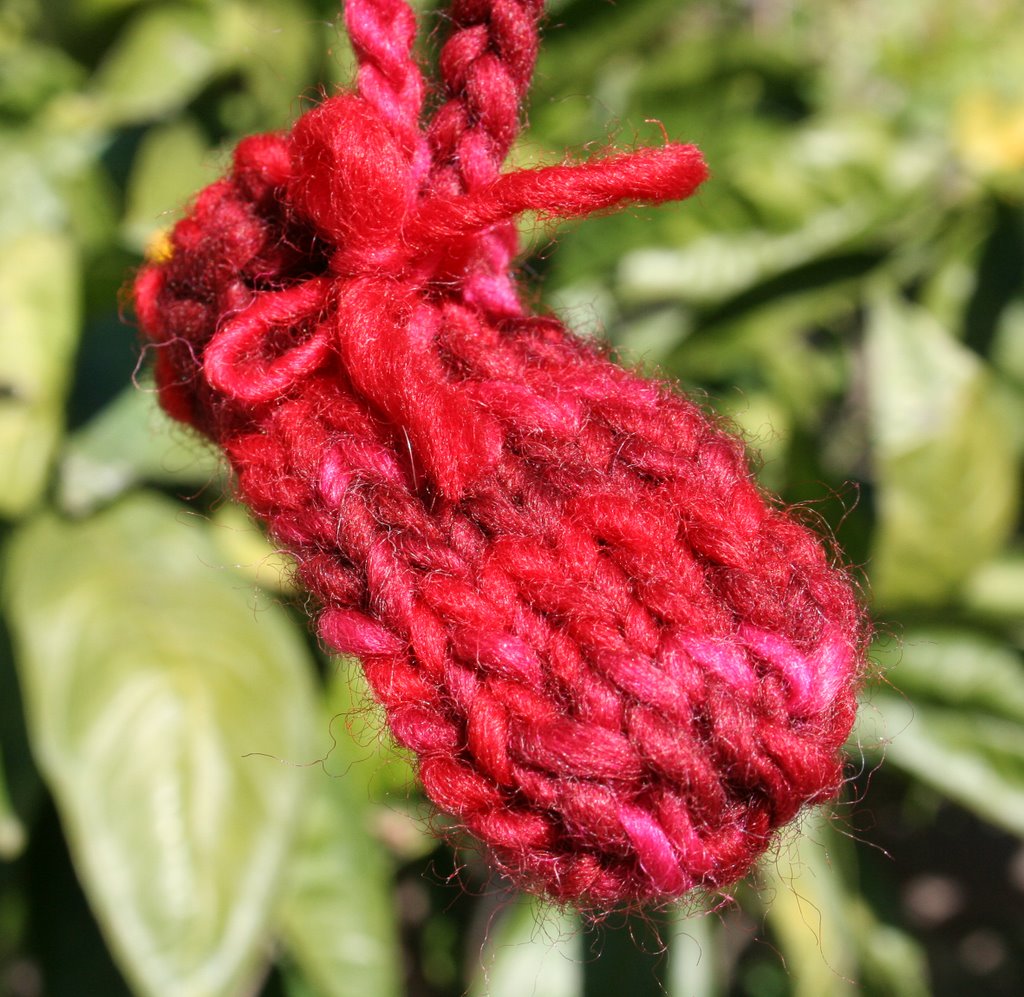
Here's another tiny mitten. I like this one much better; it has more of a mitteny shape than the larger one. Here's how it's done:

A few yards of worsted weight yarn, or really, whatever you've got on hand.
DP needles to give you a pleasing guage.

I used Manos del Uruguay Bing Cherry and size 7 needles.

CO 3 sts loosely
Knit one row
Flip the stitches over so you can see the purl bumps on the bottom. On a second needle, pick up and knit 3 sts through those bumps. (This is one way to start socks from the toe up, too.)

You should now have three stitches on each of two needles, and they're ready to work in the round.

On each needle, k1, m1, k1, m1, k1
You should now have five stitches on each needle.

Knit until the "hand" of your mitten is as long as you want it. Mine is about 2". On the last round, knit until the last stitch, and then stop. You're going to decrease on either side to pinch in the wrist.

Take the last stitch on needle 2 and the first stitch on needle 1, and K2tog.

Then k3, k2tog, k3. You should have 8 sts in all.

Knit k2p2 ribbing for about an inch, BO all stitches, weave in ends.

Now you want a thumb. Go about 2/3 of the way down from the start of the mitten and about one stitch away from the right edge (or left edge, if you want a righthanded mitten!). Stick the point of one of your needles through the lefthand legs of two sts, and join yarn for I-cord. About 3 rounds of I-cord will give you the right length; break yarn and thread through the two loops on your needle; pull in while shaping the thumb to your liking, and then weave in the end.


To make a tie to hang the mitten, I just made a little rope of single crochet, and threaded the starting and BO ends through a couple of stitches on the back and tied a little bow.

Tuesday, November 28, 2006

Little Mitten Prototype


I've been thinking about Christmas ornaments. Last year I had the tiny sweaters; this year I'm thinking about tiny mittens and stockings. This is my first crack at a mitten prototype. I think it needs some tinkering, and then I should have a pattern for it in a couple of days. But I'm still hanging this one on the tree, even if it goes in the back.

Sunday, November 26, 2006

Japanese Teapot Cozy


There's nothing DH likes better than his daily pot of gen mai chai from our friends at Cafe Moto. Torrey was kind enough to set him up with an iron Japanese pot and everything, and they even deliver the tea - if you're in the San Diego area (or not - they'll send), you should check them out.

Anyway, I wanted to knit him a cozy to keep his tea piping hot, so I started to knit up the Kureyon tea cozy in Knitty. Lo and behold, right after knitting the really cool bottom (with secret sachet compartment and all - not that DH will ever likely put a sachet in that puppy, especially since the tea is so fragrant) I took a hard look at the teapot and realized the shape was entirely different from the ones the cozy was designed for.


I didn't want to rip it out (I've had a bad enough week along those lines) so I just improvised as I went on, adding sharp increases & decreases for the squashed football shape, and adding a purl ridge where there's seam in the metal on the pot itself. I finished the whole thing up with a crocheted edge along the opening.

If I had to do it over, I'd make it in two halves to gather around the little knob on the lid, but hey - it works, it's cute, and it's super-efficient at keeping even the last drop of tea hot.

Saturday, November 25, 2006

Even Lobsters Get Cold....


You know how some people put sweaters on teddy bears? Here in the Windansea household we have a fondness for spikier creatures. DD#3 thought her lobster might be cold; DD#2, who is a seat-of-her-pants kind of knitter with no use for any kind of pattern, designed this garment on the fly for the lucky crustacean. It has ribbing at the neck and waist (or whatever you call the juncture between the thorax and abdomen - my invertebrate zoology days are loooong gone) and six armholes.

Monday, November 20, 2006

Casting On, Ripping Out


I had the most frustrating knitting day yesterday. I was working on a pair of knucks and decided to knit the textured cuff, which calls for a crab stitch finish. Mine kept coming out more like the crap stitch finish, so now I have a forlorn knuck sitting on my mousepad impaled on a crochet hook.

But we were going to the beach for dinner and I needed something portable, so I quickly printed out the pattern for something I can't talk about because it's a Christmas present for someone who might read this. Okay. I can't even begin to tell you how many times I cast on 8 sts, did a m1k1 round and came out with the wrong number. I ripped that sucker back a good 6/7 times.

Meanwhile, DD#1 decided she wanted to knit a hat for Batman - don't ask. So I had some leftover Manos wool in cool fall colors (leftover from making the Knecklace below - not one of my better endeavors, frankly - check out that one tight row of yarn overs there),

except that she can't cast on by herself. We cast on 88 sts. Knit a row. Decided the guage was too tight. Ripped back, started over. Started again, knitted half a round, came to some kind of craziness in the cast-on edge, ripped back. It's now sitting to the left of my keyboard, where she left it on her way to school this a.m.

Something cool did happen today though - I went to Ulrika's blog and saw that she has a picture of her rendition of the Father/Daughter Hat! That was a thrill - to see someone use one of my patterns.

Sunday, November 19, 2006

The Yoke's on Me....


Here's the chart for the yoke from the blue sweater, if anyone else would like to use it. Note that there are a couple of places in the medium blue where I have two solid rounds of color - that's where I decided to add decreases (this was my first attempt at this kind of sweater, so I had to think long and hard about that part!).


Also fyi, because I had to think long and hard about this part, I found in the back of EZ's Knitter's Workshop a line about managing the decreases in a younger child's sweater - instead of 1/3, 1/3, 1/3, you decrease 1/3, 1/3, 1/4....this makes the head opening bigger for their proportionally larger noggins. You can place the 1/4 in any of the decrease rounds. 1/4 decrease is K2, K2tog. I'm just saying it here because I had to doodle that out with pencil and paper - maybe it's obvious to everyone else, but I guess I'm slow that way!

Okay, so on to the chart. It's a 12-stitch repeat; obviously you can use other colors, but I chose a dark blue, a medium blue, a light blue, and white. I used to quilt, so the whole dark/medium/light/accent thing appealed. I copied this from my scrawled out notes, but I think it's accurate! Please let me know if you see a problem, and feel free to use this on your own knitting!

Saturday, November 18, 2006

Blue Sweater!


Here it is, fresh from blocking. I think I may never knit a plain stockinette one-color sweater again. I loved using color, and it went really quickly because I was always so eager to see what the next row would look like. Now you can see why I ripped out that other design, too - right?

I'm working on translating my handwritten chart, which frankly looks like the dog wrote it at this point, into a graphic. I'll post that soon in case anyone wants to try it!

Friday, November 17, 2006

It Calls to Me....


Never mind the pair of knucks that only have nine fingers so far....never mind the cabled shawl with pockets....never mind anything else in the queue of projects....I've got 20 little Merino Style friends from Knitpicks crying "Take us out! Take us out!"

Wednesday, November 15, 2006

Rip....Rip....Rip....


That was the sound of me ripping six inches off the bottom of a sweater.

See, I've been reading a lot of Elizabeth Zimmerman's books lately. From them, I got the brilliant idea of turning swatches into hats (or hats into swatches) - because swatching kills me. All that wasted effort - no amount of good reasons will make me happy about swatching.

But a hat, I can get into. So I knit this hat you see above, using some directions in the back of the holiday edition of Interweave Knits. I wanted to accomplish two things - learn how to knit Fair Isle, and design a sweater using the EPS system.

The pluses:
I learned how to knit with both hands, carrying a color in each.
I made a hat in my daughters' school colors.

The minuses:
Everything else. Now that I'm done I hate the pattern. And why, why, why did I believe the directions when they said to knit the first four rounds plain? I knew it would roll!!

The worst part is this:


I started the aforementioned sweater from the bottom, with a hem for turning, and this color pattern above. I hated the pattern almost from the moment it was done, but I persevered. And today, with the rest of the sweater done, I still hated it.

So rip....rip....rip.... I now have three tidy little balls of yarn, and six or so inches of stockinette to make up on the bottom of the sweater. Sigh.

Monday, November 13, 2006

About Those Coasters....


Usually my knitmania causes me to have small projects in progress, so I can check off a bunch of FOs while knitting on something larger. But right now I have two large projects going, including this:


I'll have pictures of the hat I made as a guage swatch for this sweater in a day or two, but in the meantime, suzanne asked about the crocheted coasters, and whether they were flat enough to hold a wine glass. I'm happy to report that they are. They are super-simple to make - believe me, if I can crochet these, anyone can.


Sorry I Bought Sari Coasters

What you need:
However much recycled sari silk you have on hand
A size H crochet hook, which is also what I happened to have, ymmv

Leaving a long tail, chain 6.
Join the chain into a ring by working a slip stitch into the first chain.
Chain 1, and then work 12 sc right into the ring. You can secure the long tail by crocheting over it as you go.
Place marker....I used a little bit of wool and just pulled it out and moved it up as I crocheted each round.

Round 2 - sc into each st.
Round 3 - 2 sc into each st. 24 sts now.
Round 4 - sc into each st.
Round 5 - *1sc in first st, 2sc in next st, repeat from *. 36 sts now

Now comes your moment of truth - is it the size you want your coaster to be? Because you could keep going if not. Or you could make a placemat. But again - I like little things, so mine just stopped at the coaster stage.

Once you get to the end, break the yarn, thread it onto a yarn needle, and fasten off/weave it in.

I had quite a bit of yarn so I ended up with 12+ coasters.

Sunday, November 12, 2006

Father/Daughter Hat


John wanted a hat that could be thrown into the washing machine. One that wasn't frou-frou at all. This hat is the result - it's stretchy and easy to fit, and it decreases sharply with four raglan decreases at the top so there's not a bit of pointiness. It's easy and it's very quick; I've got it here in Encore Worsted, which is inexpensive and washable.

I've got instructions here for two sizes - the large fits adults M - XL. The small fits a child through small adult. If you want to knit it for a person with small head circumference but want it a bit longer, you could knit one inch of stockinette after the ribbing and it would work fine. Both the large and small sizes fit me, albeit a bit differently.

Materials:
1 skein of Encore Worsted, or yarn that gives similar guage. You won't use the whole thing.
Circular needle, 16", and matching DPs, in a size to give you the correct guage (I used size 5, but that's because I knit REALLY loosely - you probably need a bigger size!)

NOTE: Feel free to knit longer ribbing if you want to fold it up, or knit plain between the ribbing and the decrease section if you want the hat to cover the ears more.  That's up to you - the pattern is completely open for your interpretation!

4.5 sts/inch

To start, I used two needles together to cast on loosely; you can use whatever method you'd like to ensure a stretchy edge.


For sizes Child/S (M/L)

Loosely cast on 88 (96) sts. Join for working in the round, being careful not to twist, and place marker to signify beginning of round.
For both sizes, knit 3" of K2, P2 rib.
Knit 1/2 (1) inch plain.

Begin decreases as follows:

Decrease set-up round: *K1, SSK, K17 (19), K2tog, place marker, repeat from * to end. You have 80 (88) sts remaining.
Knit two rounds plain.

Decrease Round: *K1, SSK, Knit to last 2 sts before marker, K2tog, slip marker, repeat from * to end. You have 72 (80) sts.
See how that will work out? You have one stitch plain at the marker, and you'll be doing paired decreases on either side of it all the way through.

Knit two rounds plain.

For both sizes, repeat the Decrease Round, knitting two rounds plain between decreases, until you have 64 sts.

Knit one round plain.

Repeat Decrease Round. You have 56 sts.

Knit one round plain. You have 48 sts.

At this point, every round repeats the Decrease Round. Change to DP needles when practical.

Continue decreasing until you have 8 sts remaining. For the last part, when you start wondering how to decrease the last round of sts, because the two decreases overlap, you can decrease into the one plain stitch that's between the K2tog and SSK. Experiment - it'll work out.

Break yarn, thread through 8 remaining sts, and draw through to wrong side of hat. Weave in ends - Voila! The hat is super stretchy, so you can block if you want to, but I didn't.


Copyright 2006 Windansea/Lydia McNeil. For personal use only.

Friday, November 10, 2006

Red Placket Sweater


I remember reading there was an issue with where the placket ended up in the pattern for the Child's Placket Sweater from Last Minute Knitted Gifts - but when the time came to knit it up, I couldn't locate any errata. So, being impatient, I cast on and went for it. Sure enough, the minute it was done, I could see that the placket was about an inch to the left of where it should be.....

And one other thing - since I glanced through the directions before getting there, but was already committed, I didn't realize that the buttons on the original design where large beads pushed through the seed stitch placket. I could imagine those constantly popping through and letting the neck flop open.

So to solve these problems, I broke out the crochet hook and created some crocheted loops along the edge of the placket for these nifty toggle buttons. This centered the buttons and finished the look nicely.

The yarn is Cascade Superwash. It dyed my hands red as I was knitting, so I threw the sweater into the washer before blocking (also to test that whole "Superwash" thing), then into the dryer for a few seconds, and then laid it out flat to dry. It worked beautifully and the color held up well.

By the way, here is a link to the corrections for this pattern:

purlsoho.com book corrections

The patterns in Last Minute Knitted Gifts are gorgeous and inspiring, by the way!

Monday, November 06, 2006

Five Hour Baby Sweater


I wanted to learn top-down sweater construction, and what better way than with this? It's the Five Hour Baby Sweater, made with one skein of some Lana Gatto yarn I had. It's fast, it's cute, it's functional....I just ordered Barbara Walker's book on Knitting From the Top because of it, too. A google search will give you a bunch of links to this pattern and all its variations, but here's one:

Lorraine Major's Verion of the 5 HBS

I'll add this - the sweater was just okay until I added the buttons. The buttons made it! It's really the details that finish things off.